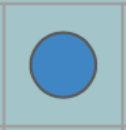
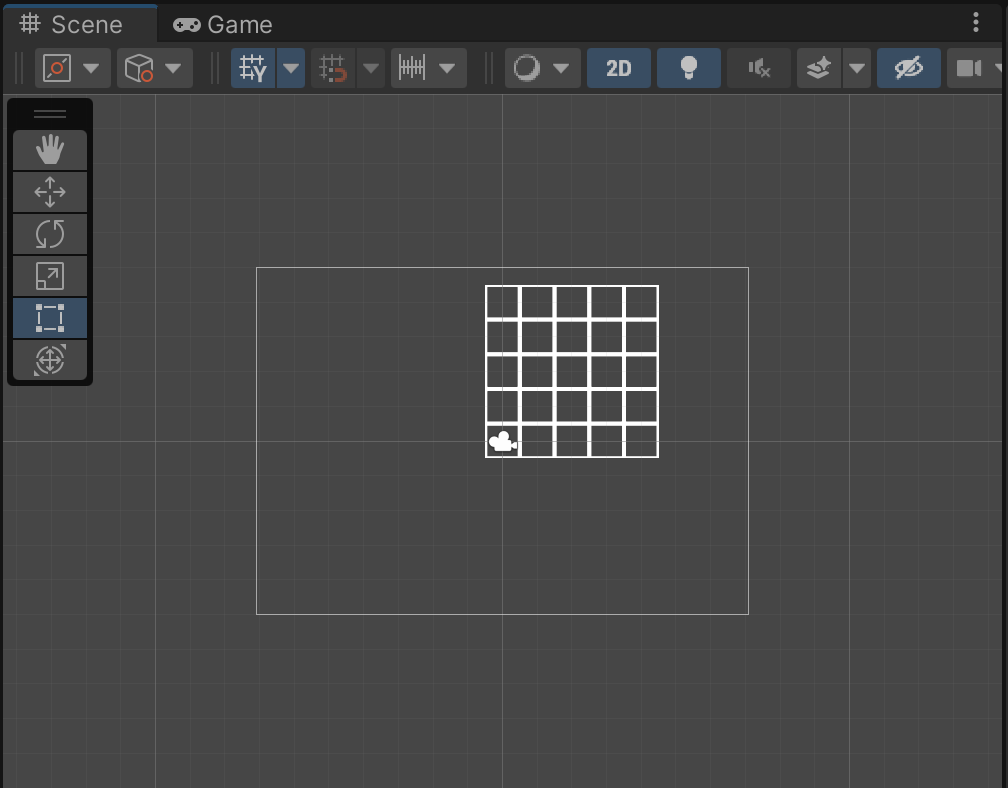
유니티에서 위의 그림과 같은 그리드를 만들어 보도록하겠습니다.
(가운데 있는 GamePiece는 다른 포스트에서 다루도록하겠습니다.)
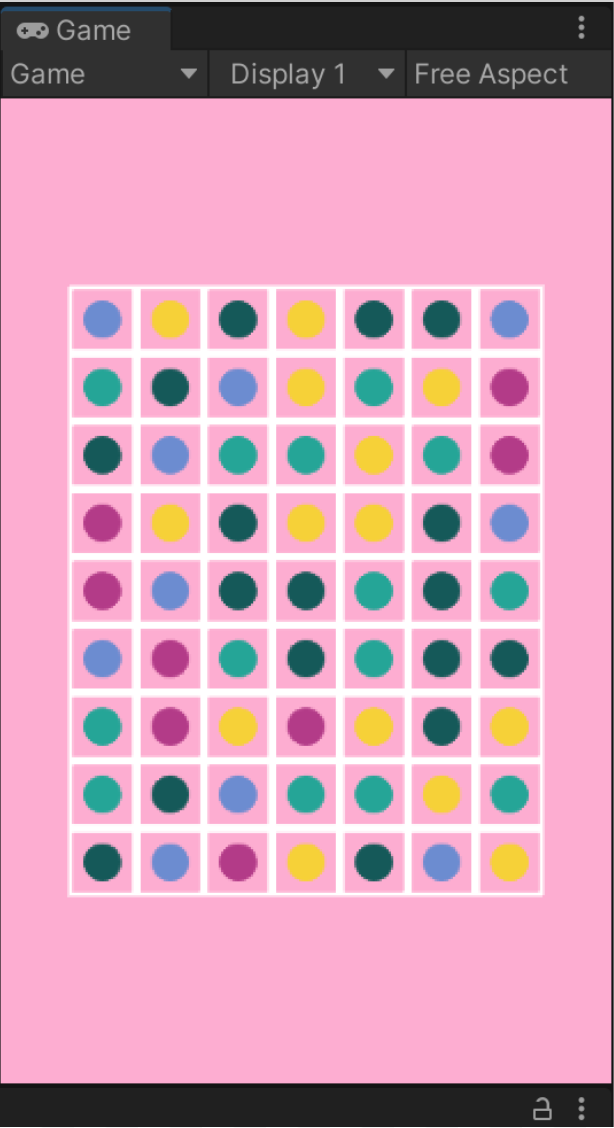
5x5 퍼즐 게임에서 그리드는 만드는 방법입니다.
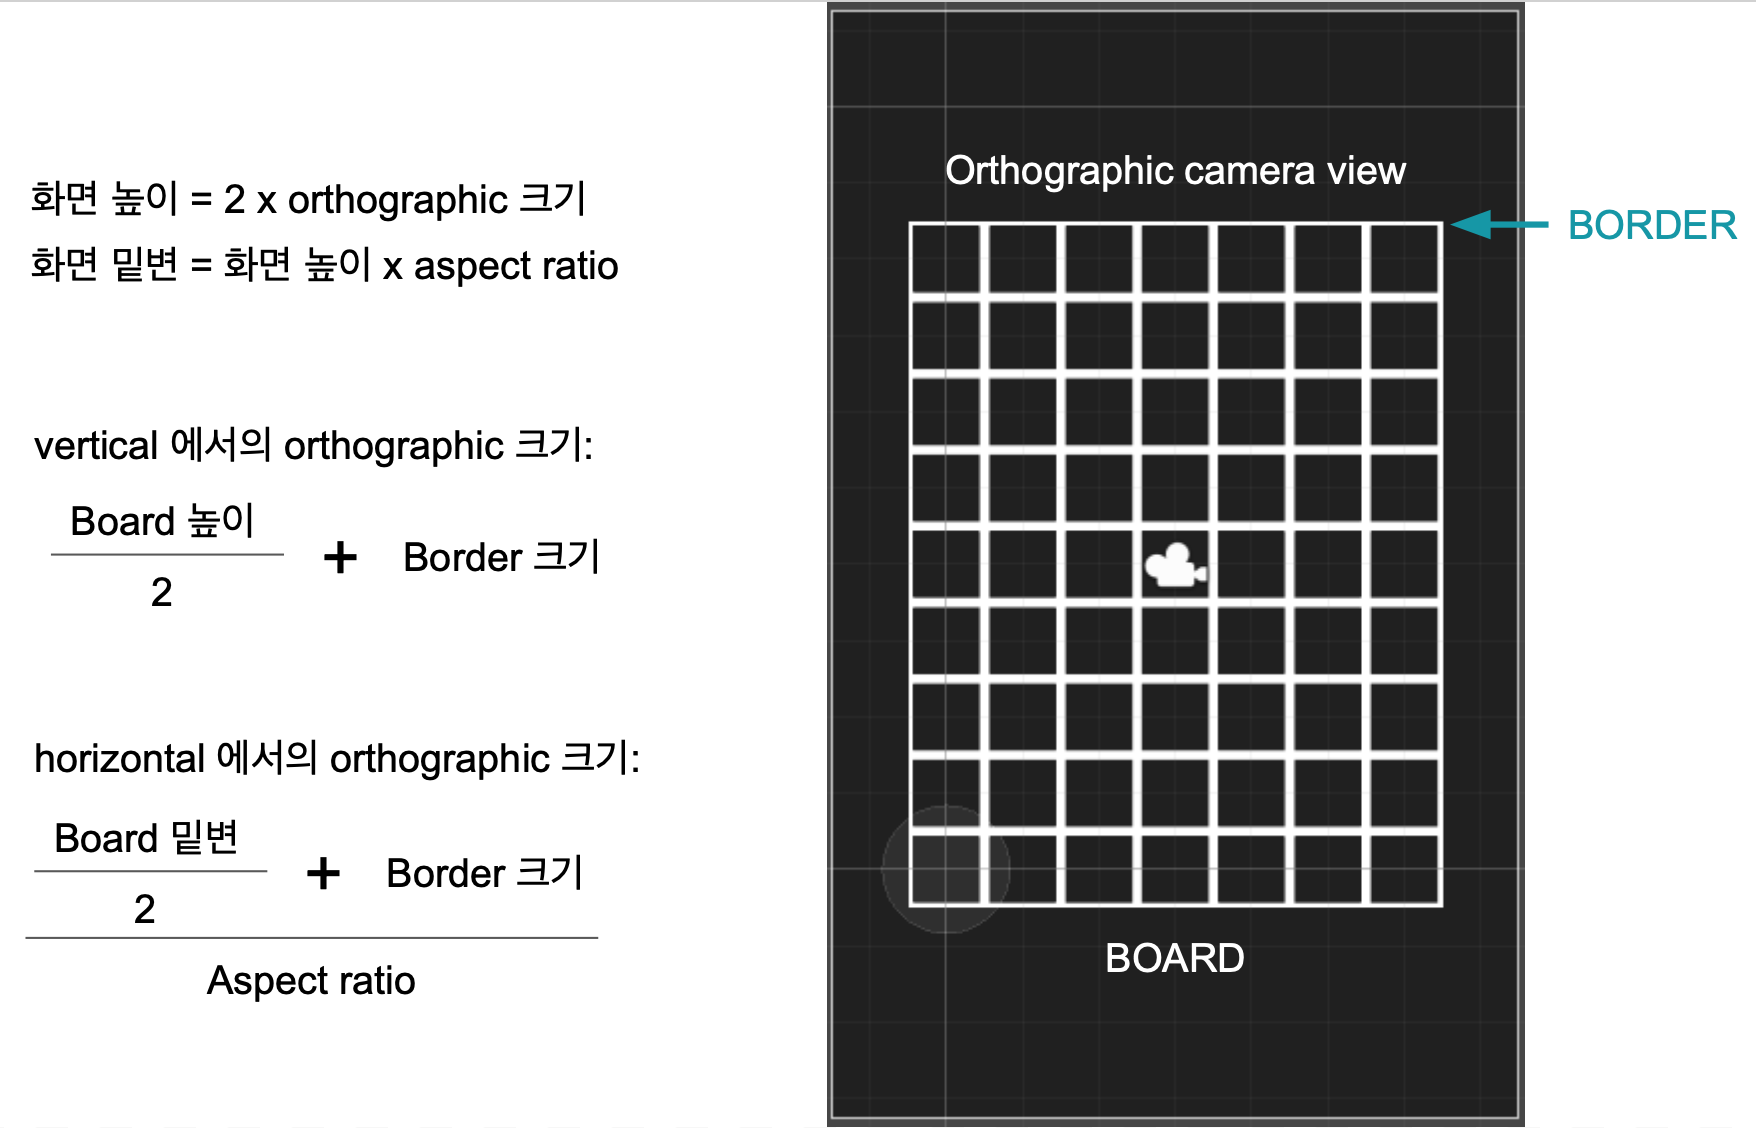
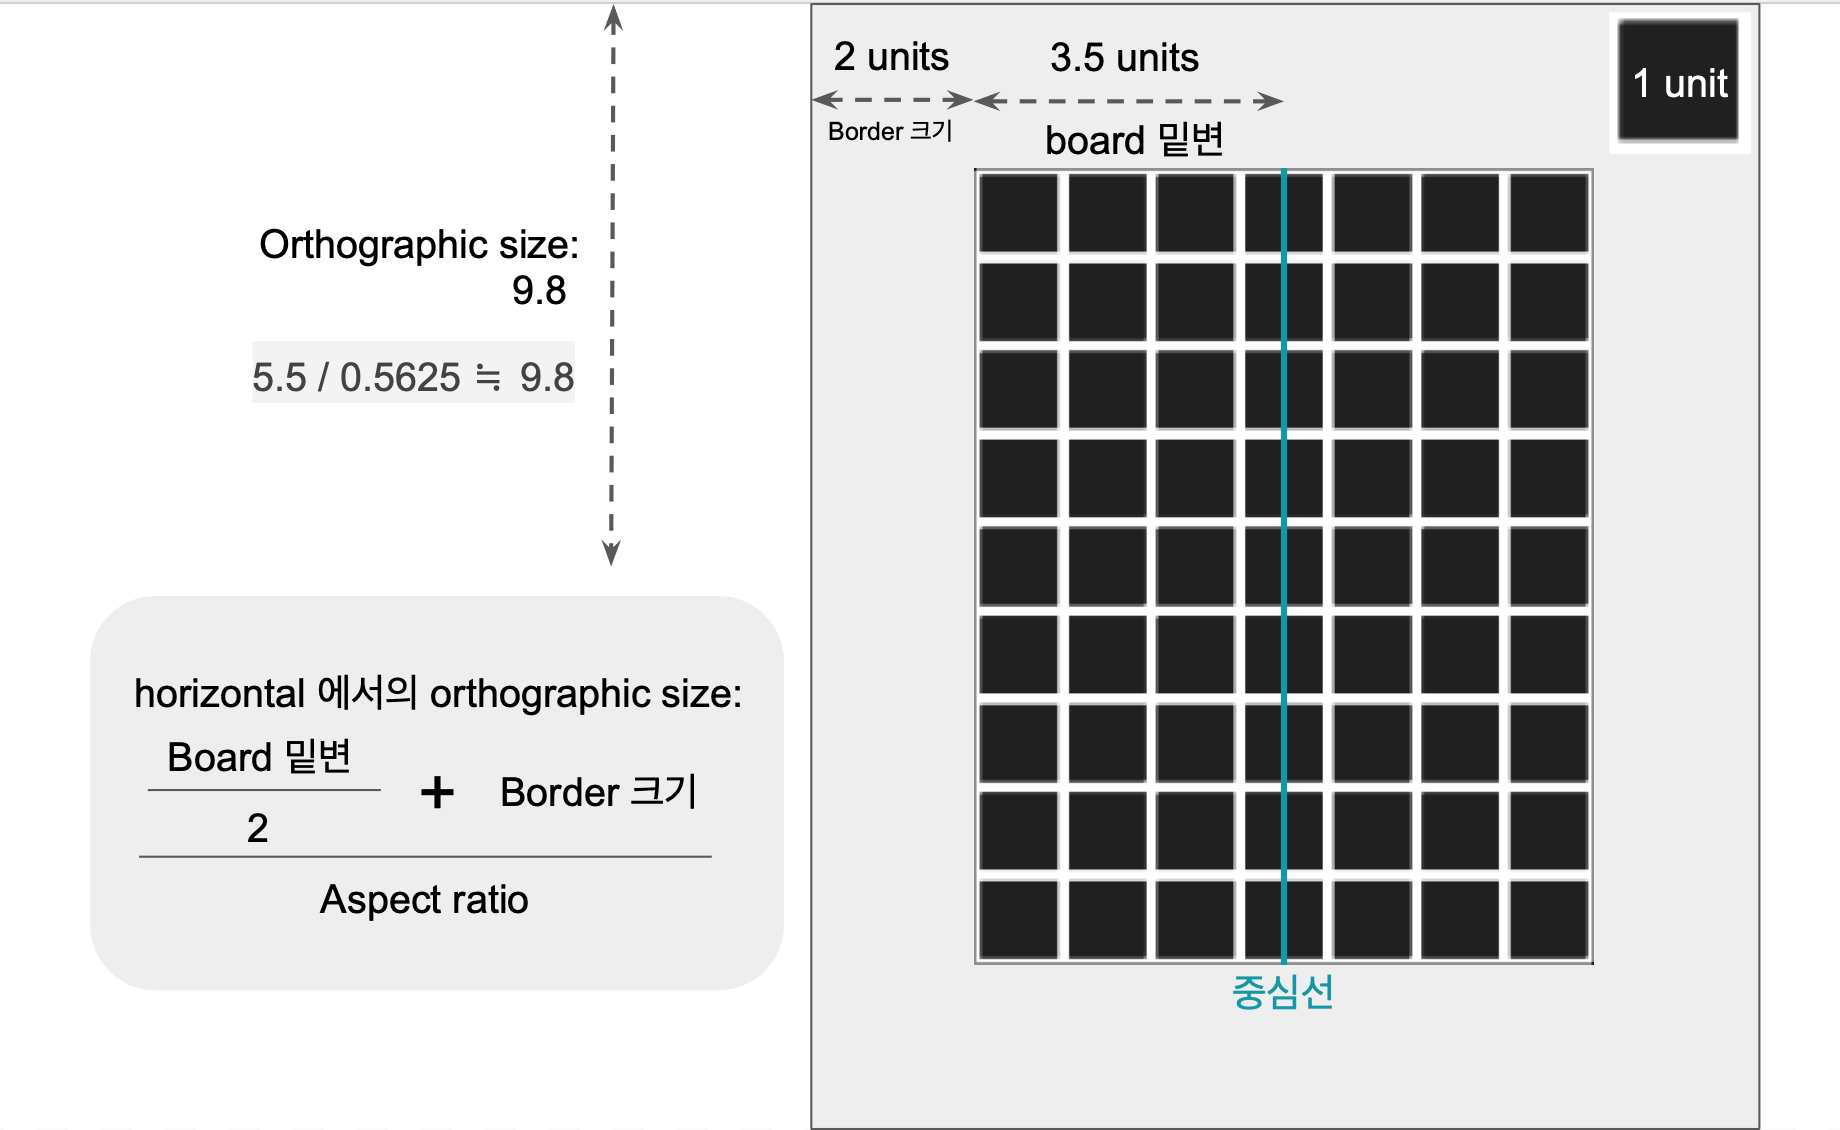
해당 포스팅을 따라해도 화면이 생각과 다르게 나옵니다.
이러한 문제는 카메라 세팅을 만지면 해결할 수 있으니 다음 글에서 확인해주세요.
0. 용어설명
GamePiece: 동그라미 Game Object로써, 사용자가 움직일 대상입니다.
GamePiece
Tile: 그리드에서 각 칸에 해당되는 Game Object로써, Board안에서 배열로 위치합니다.
Tile
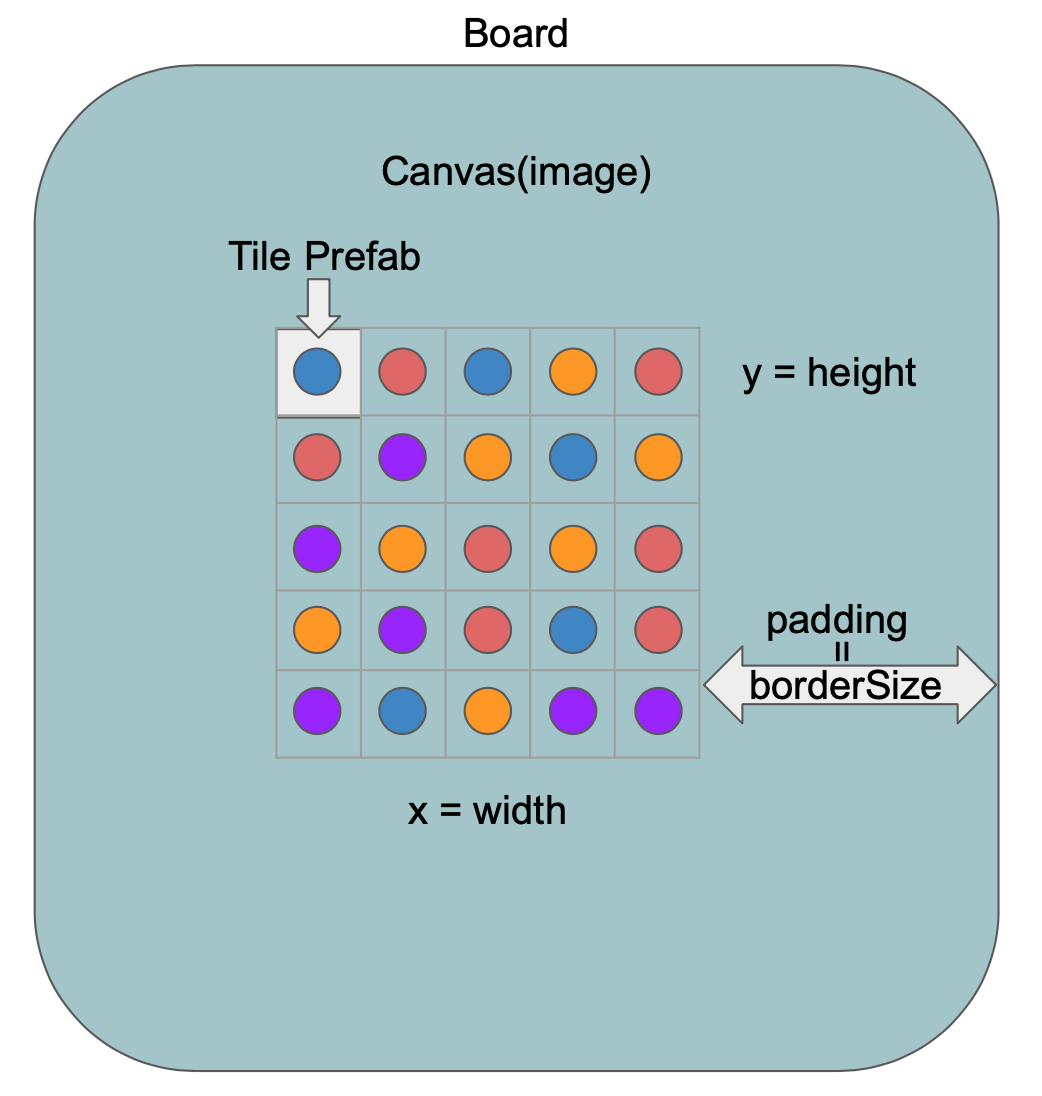
Board: Tile과 GamePiece prefab에 위치(좌표)를 설정하는 Game Object입니다.
1. 보드 (Board)
1. GameObject 생성
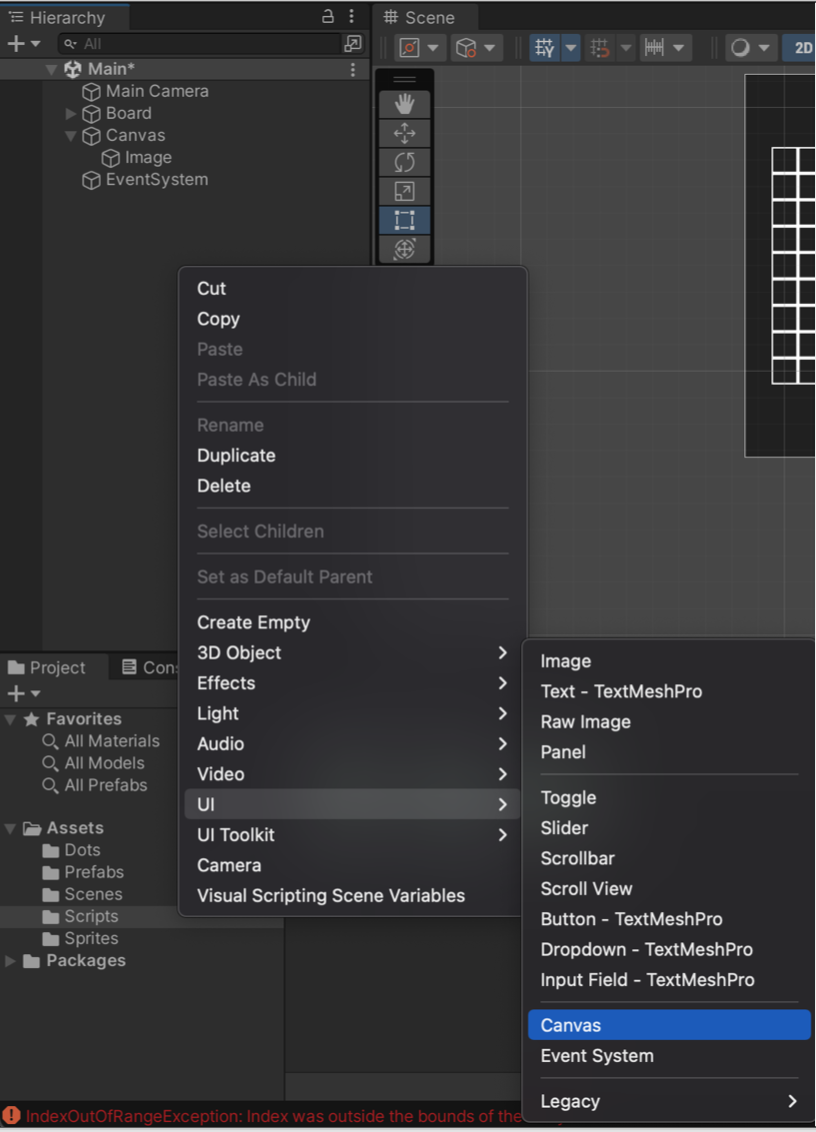
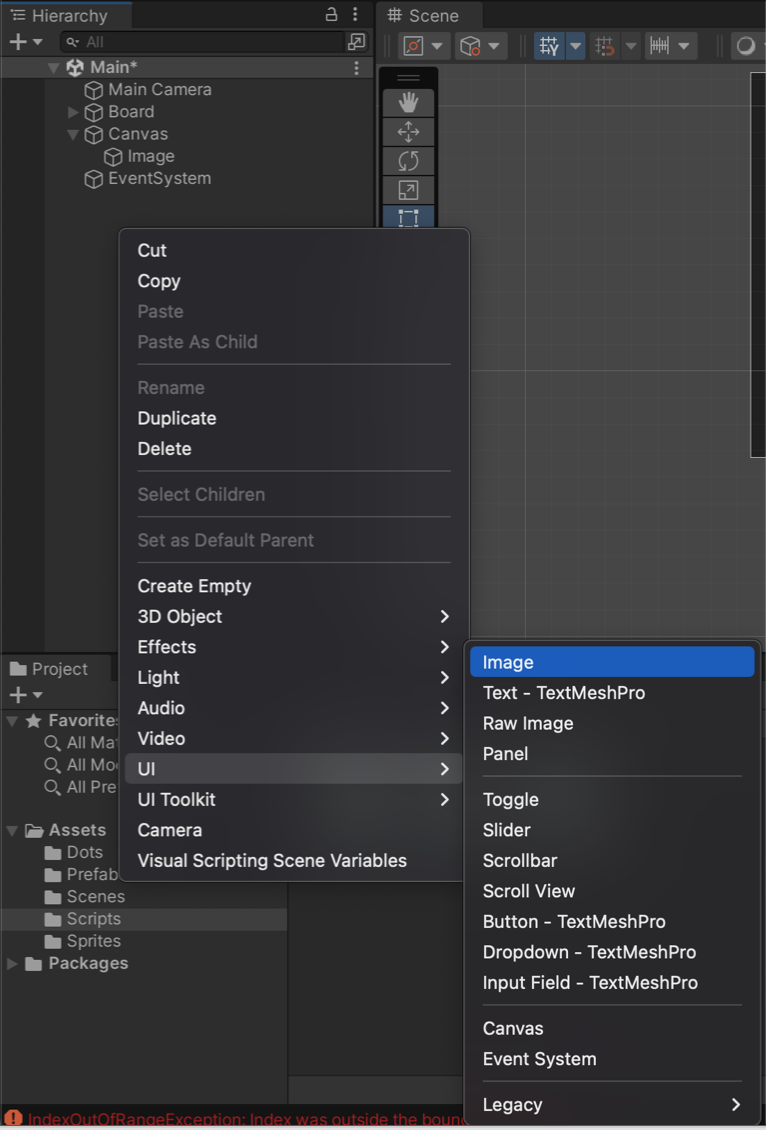
Hierarchy에서 Create Empty를 선택하여 GameObject를 생성합니다.
생성된 Game Object의 이름을 "Board"로 변경합니다.
2. 스크립트 추가
Project-Assets에서 C#Script를 생성합니다.
파일 이름을 "Board"로 변경합니다.
using UnityEngine;
using System.Collections;
public class Board : MonoBehaviour {
public int width;
public int height;
public GameObject tilePrefab;
private Tile[,] m_tiles;
void Start (new Tile[width,height];
SetupTiles();
}
void SetupTiles (for (int i=0 ; i < width; i++)
{
for (int j=0 ; j < height; j++)
{
GameObject tile = Instantiate (tilePrefab, new Vector3(i, j, 0 ), Quaternion.identity) as GameObject;
tile.name = "Tile (" +i+"," +j+")" ;
m_tiles[i,j] = tile.GetComponent<Tile>();
tile.transform.parent = transform;
}
}
}
}width: 타일의 갯수, height: 타일의 갯수.
tilePrefab: 보드에 배치하는 Game Object.
m_tiles: 좌표에 필요한 tilePrefab의 배열.
SetupTiles():
tilePrefab을 이용하여 Game Object 인스턴스를 생성하여 보드에 나열합니다.
보드에 나열할때는 Tile이라는 prefab을 이용하여 나란히 정렬합니다.
좌표는 for문으로 i는 x축을, j는 y축으로 합니다.
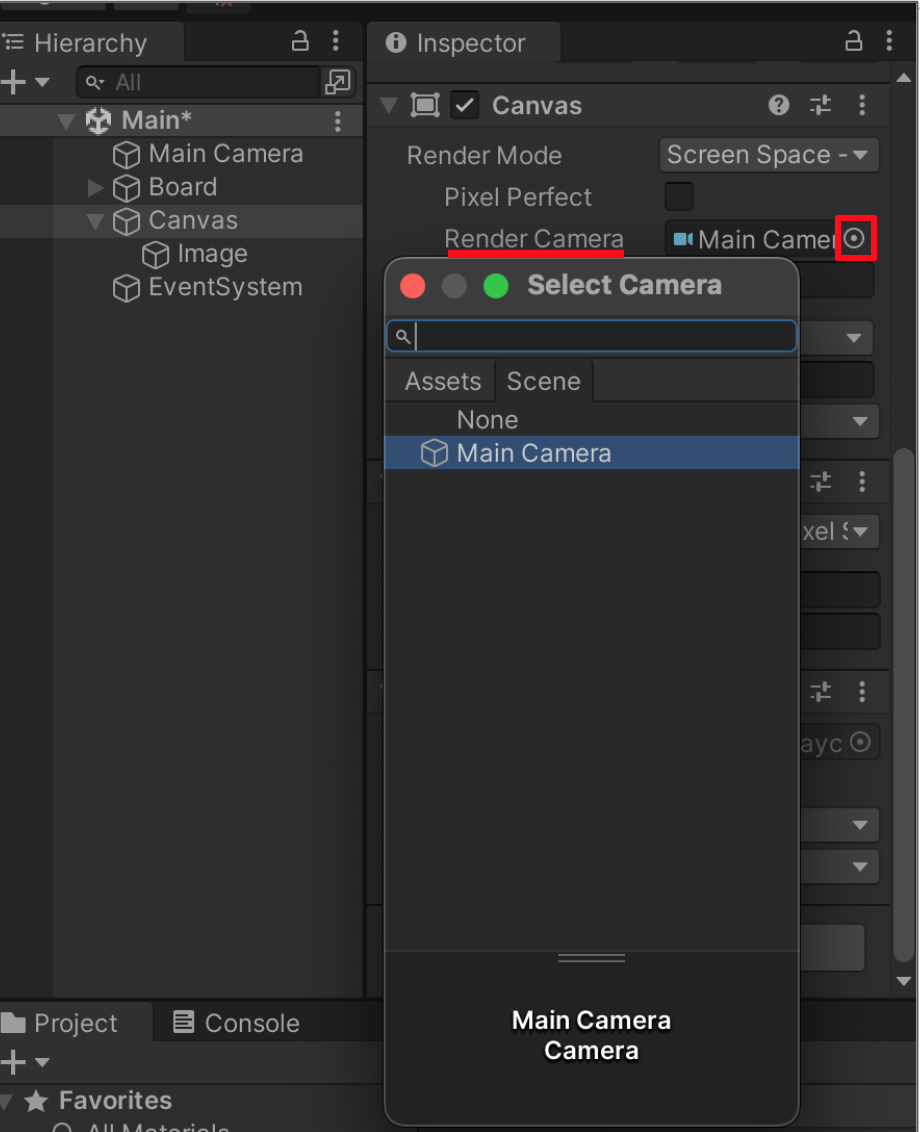
해당 작업이 끝났다면, Board GameObject를 선택하여 Inspector에서
Add Component를 이용하여 Board.cs를 추가합니다.
2. 타일(Tile)
1. GameObject 생성
Hierarchy에서 Create Empty를 선택하여 GameObject를 생성합니다.
생성된 Game Object의 이름을 "Tile"로 변경합니다.
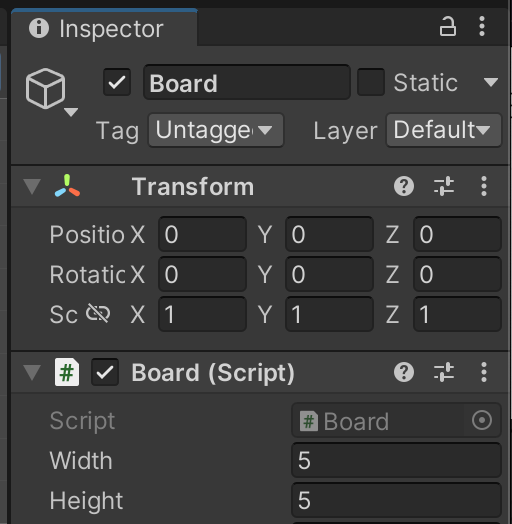
2. Rendering 추가
"Tile" Game Object의 Inspector에서 Add Component를 누릅니다.
Rendering > Sprite Renderer를 선택합니다.
흰색 테두리 그림
위 그림과 같이 안쪽이 비어있는 흰택 테두리 png파일을
Inspector>Sprite Renderer의 Sprite에 추가합니다.
Tile의 Sprite Renderer에 Sprite추가 하는 장면
3. 스크립트 추가
Project-Assets에서 C#Script를 생성합니다.
파일 이름을 "Tile"로 변경합니다.
using UnityEngine;
public class Tile : MonoBehaviour {
public int xIdx;
public int yIdx;
private Board m_board;
void Start (public void Init (int x, int y, Board board해당 작업이 끝났다면, Tile GameObject를 선택하여 Inspector에서
Add Component를 이용하여 Tile.cs를 추가합니다.
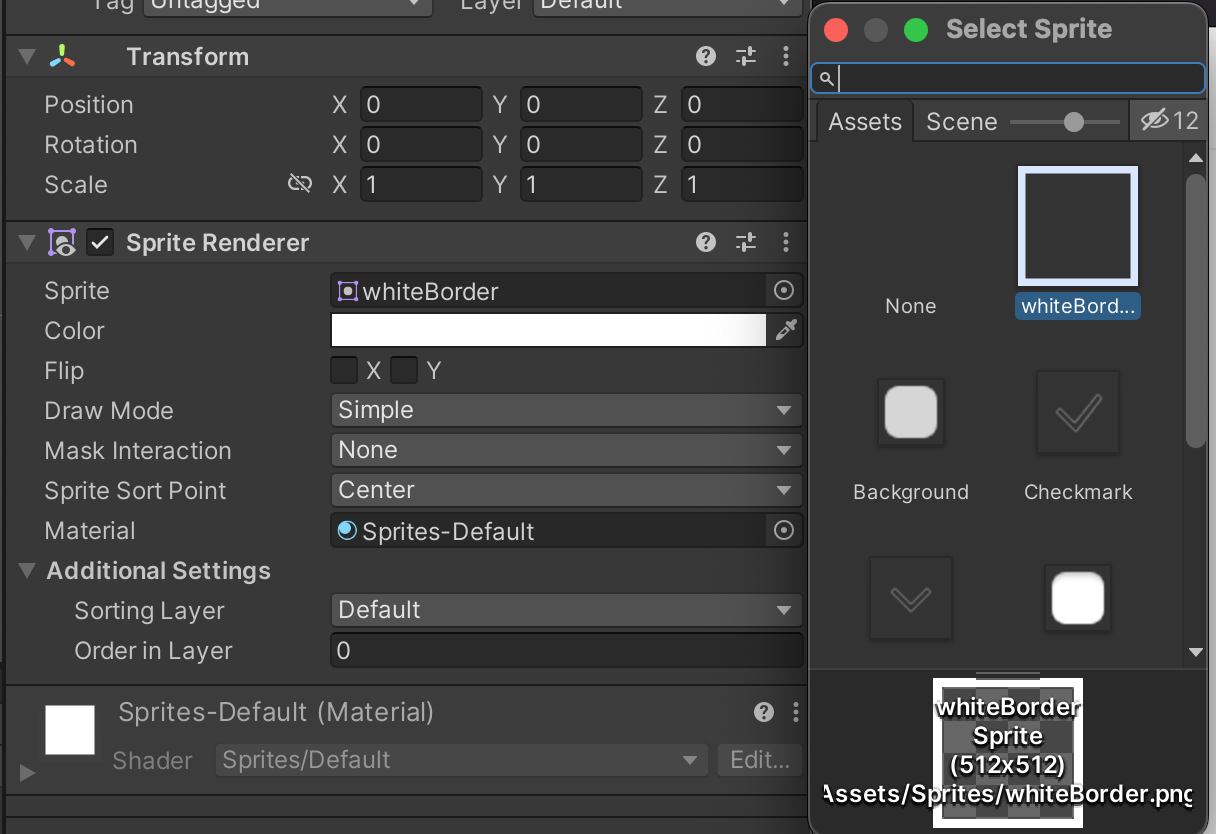
방금 만든<Tile> Game Object를 재사용하기 위해
Assets으로 드래그&드랍하여 prefab으로 변경합니다.
해당 프로젝트를 실행합니다.
그리드 완성된 모습
그리드가 화면 중심에 오지 않은 상태입니다.
다음은 퍼즐을 위한 그리드가 화면 중심에 위치시키는 글을 작성해보겠습니다.
다음에 만나요~